ge profile microwave over the range manual

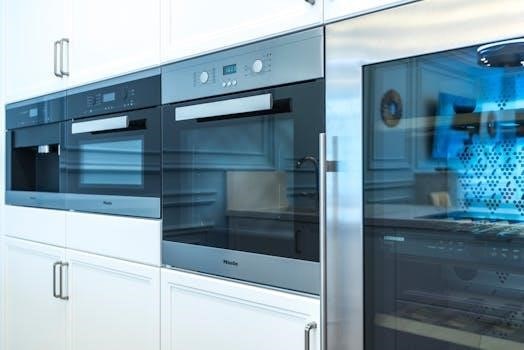
GE Profile over-the-range microwaves offer a blend of advanced features and space-saving design, ideal for modern kitchens. These models are designed to fit over ranges up to 36 inches wide and provide various cooking options like convection cooking and sensor controls.
Overview of GE Profile Microwave Models
GE Profile offers a diverse range of over-the-range microwave models, each designed to meet various cooking needs and kitchen configurations. These models vary in capacity, typically ranging from 1.6 to 2.2 cubic feet, providing options for different family sizes. Several models, such as the PVM9179SRSS and PVM9005SJSS, feature convection cooking capabilities, which allow for more versatile cooking methods beyond simple microwaving; Additionally, some models like the PVM9225SRSS are equipped with sensor cooking controls that automatically adjust cooking time and power for optimal results. The JVM series, including JVM6172DKBB and JVM3160EFES, provides standard microwave functionality. The PVM9005SJ8SS boasts a 2.1 cubic foot capacity and sensor cooking; Each model is designed for installation over both gas and electric ranges, with some models having a 400 CFM ventilation system. Users can refer to their specific model’s manual for detailed features and functionality.

Key Features of GE Profile Over-the-Range Microwaves
GE Profile microwaves boast sensor cooking, convection capabilities, and Chef Connect, enhancing cooking convenience. They also feature robust ventilation systems and LED cooktop lighting for improved kitchen functionality.
Sensor Cooking Controls
GE Profile over-the-range microwaves are equipped with advanced sensor cooking controls that automatically adjust cooking time and power levels for optimal results. These sensors detect the humidity released by food as it cooks, enabling the microwave to make precise adjustments without requiring manual input. This feature ensures that your meals are cooked thoroughly and evenly, preventing undercooking or overcooking. The convenience of sensor cooking eliminates guesswork, making it easier to prepare a variety of dishes with consistent, delicious results. The system is designed to simplify the cooking process, allowing users to achieve perfect outcomes with minimal effort. This technology is a key component of GE Profile microwaves, offering a more user-friendly and efficient cooking experience and ultimately saving time and effort in the kitchen.
Convection Cooking Functionality
The convection cooking functionality in GE Profile over-the-range microwaves combines microwave energy with a convection fan and heating element, enabling the unit to bake, roast, and brown foods like a conventional oven. This feature allows for more versatile cooking options, expanding beyond simple microwaving. The convection system ensures even heat distribution, providing consistent cooking results for everything from cookies to casseroles. It can handle metal and foil cookware safely, making it suitable for a wide array of recipes. The combination of microwave and convection cooking allows for faster cooking times while achieving oven-quality results. This makes the GE Profile microwave a multi-functional appliance, ideal for those who want to maximize their kitchen space and cooking capabilities. This ability to combine microwave and convection cooking can save a lot of time in the kitchen.
Chef Connect Feature
The Chef Connect feature in GE Profile over-the-range microwaves offers seamless synchronization with compatible GE ranges. With a single touch, users can automatically sync the microwave clock with the range clock. Furthermore, Chef Connect can also link the range elements to the microwave’s surface light and vent, providing convenience and ease of use. This feature enhances the cooking experience by ensuring that the lighting and ventilation are automatically activated when the range is in use. The microwave’s surface light will illuminate the cooktop below, and the ventilation system will help remove smoke and odors, creating a more comfortable and efficient cooking environment. Chef Connect provides three convenient options to simplify kitchen tasks, making it easier to manage multiple cooking appliances simultaneously. This feature is designed to streamline the cooking process.
Ventilation System Specifications
GE Profile over-the-range microwaves are equipped with powerful ventilation systems designed to effectively remove smoke, steam, and odors from your kitchen. These systems typically feature a four-speed fan with a maximum airflow of 400 CFM, ensuring efficient air circulation while cooking. The ventilation system can be configured for convertible venting, offering flexibility for both ducted and ductless installations. The microwaves also include a charcoal filter, often located upfront for easy access and replacement. An indicator light may also be included to signal when the filter needs cleaning or replacing. This ensures that the ventilation system is always working at its optimal performance. The ventilation system is designed to work efficiently to keep your kitchen air clean and fresh and maintain a comfortable cooking environment. The strong ventilation is a key feature of these microwaves.
Installation and Compatibility
GE Profile over-the-range microwaves are designed for installation above ranges, offering space-saving benefits. They are compatible with both gas and electric ranges, provided specific clearance requirements are met. They also may be installed in a cabinet.
Installation over Ranges
GE Profile over-the-range microwaves are specifically designed for installation above standard ranges, optimizing kitchen space. These units are compatible with both gas and electric ranges up to 36 inches wide. When installing, ensure a minimum clearance of 3 inches (7.6 cm) between the top of a lower oven cutout and the microwave’s cutout floor, if applicable. It’s crucial to verify that the range beneath does not exceed 60,000 BTUs for gas models. The microwave is UL listed for safe installation over either type of range. Refer to the range and microwave owner’s manuals for specific instructions and safety precautions during the installation process. Proper installation ensures optimal performance and safety, so follow the guidelines carefully.
Cabinet Installation Considerations
While primarily designed for over-the-range installation, GE Profile microwaves can also be installed within a cabinet if needed. When opting for cabinet installation, it’s essential to ensure adequate space and proper ventilation for the unit. Check the microwave’s specifications for the correct cabinet cutout dimensions. The microwave may require additional support structures within the cabinet to securely hold its weight. The cabinet must also be designed to allow sufficient airflow around the microwave to prevent overheating and ensure optimal performance. Refer to the owner’s manual for specific measurements and installation instructions to avoid potential issues. Proper cabinet installation guarantees safety and proper functioning of the microwave.
Grounding Instructions
Proper grounding is crucial for the safe operation of your GE Profile over-the-range microwave. These units are UL listed for installation over both gas and electric ranges, requiring a grounded electrical outlet. Always ensure the microwave is connected to a properly installed and grounded three-prong outlet. Refer to the owner’s manual for detailed grounding instructions specific to your model. The grounding wire should be securely connected to the designated terminal. Failure to properly ground the microwave can lead to electrical shock hazards. Avoid using extension cords; instead, use a dedicated grounded outlet. Consult a qualified electrician if you are unsure about the grounding requirements or if your outlet is not properly grounded. Adhering to grounding instructions ensures safe operation.

Operation and Usage
Operating your GE Profile microwave involves understanding its various functions, from setting the clock to utilizing the convection feature. The user manual is key for mastering its controls and options.
Setting the Clock
To set the clock on your GE Profile over-the-range microwave, begin by locating the “Clock” button on the control panel. Once pressed, the display will likely flash, indicating that it is ready for time input. Use the dial or number pad to enter the current time. Be mindful to set the correct AM or PM designation if applicable; After inputting the correct time, press the “Enter” button to save the setting. If you encounter any issues during clock setting, consult your microwave’s user manual for specific instructions tailored to your model. Some models might have minor variations in the clock-setting procedure, so the manual is your best resource. Ensuring the clock is set correctly is a simple but crucial step for optimal microwave usage.
Using the Microwave Function
To utilize the microwave function on your GE Profile over-the-range microwave, start by placing your food inside, ensuring it’s in a microwave-safe container. Close the door securely. Next, use the control panel to select your desired power level. This can be done by pressing the “Power Level” button and selecting the percentage. Then, input the cooking time using the number pad. For example, if you need four minutes of cooking, press ‘4⁚00’ or use the quick-minute buttons. After setting the time, press the ‘Start’ button. The microwave will begin to operate. If you need to pause or stop it before the timer is up, press the “Stop” or “Cancel” button. Remember that using the microwave function is straightforward, but familiarize yourself with the controls for optimal results; Also, be aware that some models may have slight differences in button layout.
Using the Convection Feature
To use the convection feature on your GE Profile over-the-range microwave, start by ensuring your food is in appropriate cookware, such as metal pans or foil, which are safe for convection cooking. Select the ‘Convection’ function on the control panel, typically by pressing the ‘Convection’ button. Then, set your desired cooking temperature using the number pad or dial. Next, enter the cooking time. Preheating the oven can improve results so allow some preheat time. Once settings are input, press the start button. The convection function uses hot air circulation to cook food. Monitor your cooking and adjust time or temperature as needed. Do not use the microwave function when convection is being used. Remember that convection cooking will produce oven-quality results. Always check your user manual for model specific instruction.

Maintenance and Troubleshooting
Maintaining your GE Profile microwave involves tasks like filter resets and accessing user manuals. Troubleshooting may require consulting the manual for specific error codes and solutions.
Filter Reset Procedures
The GE Profile over-the-range microwave features a charcoal filter, typically located upfront, that requires periodic resetting. The microwave may have an indicator light to signal when a filter reset is needed. To reset, consult your specific model’s owner’s manual, which can be found on the GE Appliances website by entering your model number in the search box. The manual will guide you through the exact steps, as the procedure may vary slightly between models. Generally, the reset process involves pressing specific buttons on the control panel, sometimes in combination. Always refer to your manual for the exact instructions and make sure to perform the reset process after replacing or cleaning your filter to ensure proper function and accurate filter notifications. Neglecting this step might lead to premature filter change alerts.
Accessing User Manuals
To access the user manual for your GE Profile over-the-range microwave, the primary method is through the GE Appliances website. Navigate to geappliances.com and locate the search box, typically at the top of the page. Enter your specific model number into this box and click the search icon or press the ‘Enter’ key. This action will direct you to the dedicated product page for your appliance. On this page, find the ‘Owner Support’ tab and click it; this will lead you to the ‘Manuals and Downloads’ section. Here you will find digital copies of your owner’s manual, installation instructions and other relevant documentation. You can view or download these manuals for offline reference. The manuals provide comprehensive instructions on operation, maintenance, and troubleshooting. These online resources also include safety precautions and cooking tips.